
Mini Red Velvet Cakes: A Bite-Sized Twist on an American Classic

In the landscape of American desserts, few cakes captivate as much as the Red Velvet Mini Cakes. Its unique color and velvet-like texture, paired with the tangy cream cheese frosting, never fail to amuse the taste buds. Today, we’re going to delve into a bite-sized adaptation of this classic: Mini Red Velvet Cakes. These mini delights promise all the charm of the traditional red velvet cake but in a delightful, party-perfect size.
Before we embark on the exciting journey of crafting these Mini Red Velvet Cakes, let’s take a moment to explore their history and cultural significance.
A Glimpse into History: Red Velvet Cake
The origin of Red Velvet Cake is shrouded in mystery. However, the most popular narrative attributes its birth to the American South, where it has been a beloved dessert for centuries. The name ‘Red Velvet’ aptly describes the cake’s signature characteristics: its vibrant red color and velvety crumb structure.
The red hue was originally due to the reaction between natural cocoa powder, which contained anthocyanins (a type of pigment), and acidic ingredients like buttermilk and vinegar. This chemistry produced a cake with a reddish-brown hue. However, the ‘red’ we know today became more pronounced during World War II, when bakers began using beetroot to enhance the color during rationing times.
The cream cheese frosting that’s now typically paired with Red Velvet Cake actually came later in its history. The original frosting was a French-style roux icing, also known as ‘Ermine frosting.’ Over time, however, cream cheese frosting gained popularity for its beautiful pairing with the lightly chocolatey flavor of the cake, and it became the standard frosting choice.
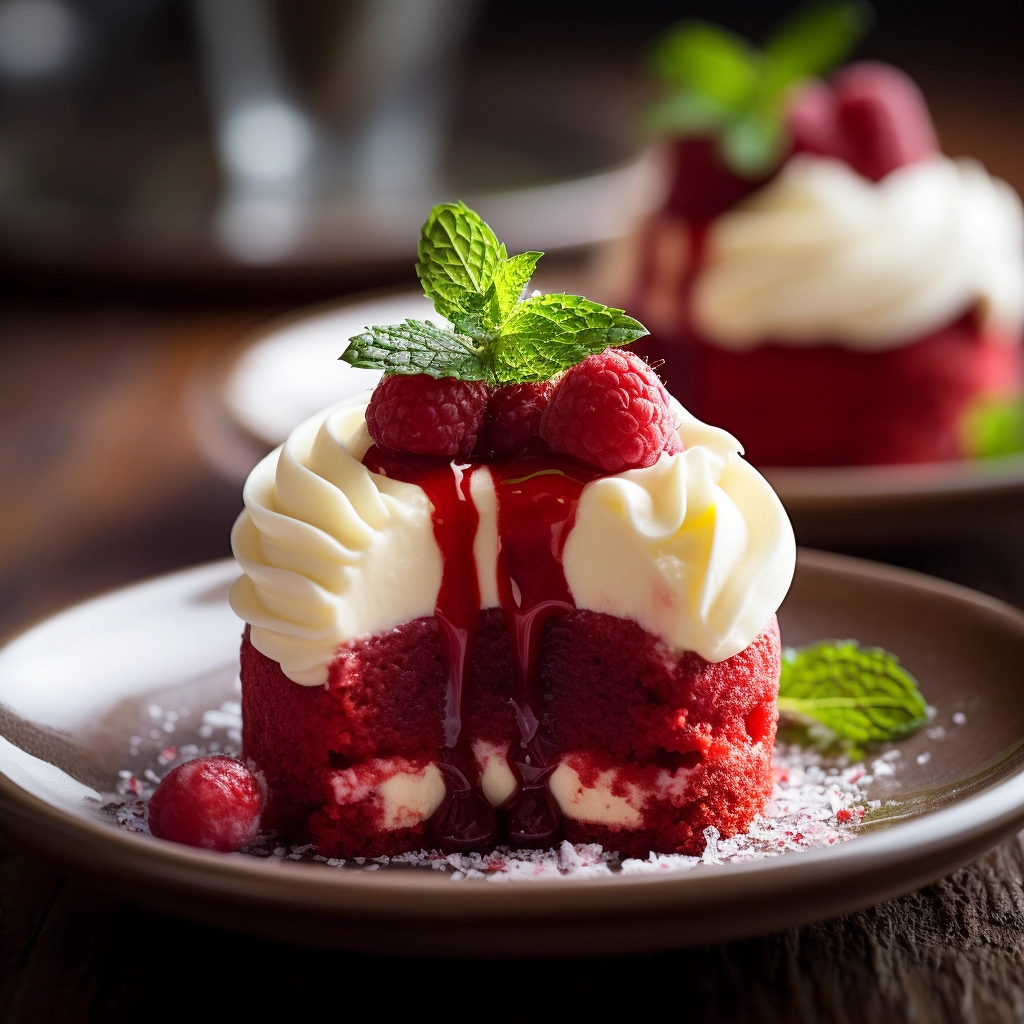
Recipe: Mini Red Velvet Cakes
Enough history! Now, let’s dive into our recipe for Mini Red Velvet Cakes. They’re perfect for serving at parties, as a delicious treat , or as a sweet gift for your loved ones.
Ingredients:
For the Mini Red Velvet Cakes:
– 2 cups all-purpose flour(250 gr)
– 1.5 cups granulated sugar(200 -250 gr)
– 1 teaspoon baking soda
– 1 teaspoon salt
– 1 teaspoon cocoa powder
– 1.5 cups vegetable oil(350 ml)
– 1 cup buttermilk, at room temperature(240 ml)
– 2 large eggs, at room temperature
– 2 tablespoons red food coloring
– 1 teaspoon white distilled vinegar
– 1 teaspoon pure vanilla extract
For the Cream Cheese Frosting:
– 1 pound cream cheese, softened(450 gr)
– 2 sticks unsalted butter, softened(225 gr)
– 1 teaspoon pure vanilla extract
– 2 cups powdered sugar (250 -300 gr)
– fresh raspberries ,mint for garnish
Instructions:
1. Preheat the oven to 350°F (175°C). Grease and flour a mini cake pan or mini muffin pan.
2. In a large bowl, sift together the flour, sugar, baking soda, salt, and cocoa powder.
3. In another large bowl, whisk together the oil, buttermilk, eggs, food coloring, vinegar, and vanilla extract.
4. Gradually add the sifted dry ingredients to the wet ingredients, mixing until the batter is smooth and thoroughly combined.
5. Distribute the batter evenly among the prepared cake or muffin wells, filling each about 2/3 of the way full.
6. Bake for about 20-25 minutes, or until a toothpick inserted into the cakes comes out clean. Allow the cakes to cool in the pan for 10 minutes, then remove them to a wire rack to cool completely.
7. While the cakes are cooling, prepare the frosting. In a large mixing bowl, beat the cream cheese and butter until smooth. Add the vanilla extract and gradually add the powdered sugar, beating on low speed until combined. Increase the speed to high and beat until the frosting is light and fluffy.
Buttermilk recipe:
Making buttermilk at home is simple and requires just two ingredients: milk and an acid, usually lemon juice or white vinegar. Here’s a straightforward recipe:
Ingredients:
– 1 cup (240 ml) milk
– 1 tablespoon (15 ml) lemon juice or white vinegar
Instructions:
1. Pour the milk into a bowl.
2. Add the lemon juice or vinegar.
3. Stir to combine and let the mixture sit at room temperature for about 10-15 minutes. During this time, the acid will curdle the milk slightly, making it slightly thicker and tangy – just like buttermilk!
4. After it’s set, stir once more, then it’s ready to use.
This homemade buttermilk can be used immediately in your recipe, or it can be stored in the refrigerator for up to two weeks. Please note that this substitute may not be as thick as store-bought buttermilk but works well for most baking recipes that require buttermilk.
Assembling the Mini Red Velvet Cakes:
- Once the cakes are completely cooled, use a piping bag or a knife to frost the tops of the cakes with the cream cheese frosting.
- Optionally, decorate with red velvet cake crumbs or sprinkles for an extra touch of charm.
Mini Red Velvet cakes are a delightful and visually stunning treat that brings a touch of luxury to any occasion. From its mysterious origins to its coveted place in the world of desserts, this classic cake continues to captivate with its vibrant red color and irresistible flavors. Whether you’re celebrating a special event or simply indulging in a sweet craving, these mini cakes are sure to impress. So, gather your ingredients, follow the recipe, and savor each bite of these scrumptious treats. Let the allure of Red Velvet cake transport you to a world of indulgence and delight!
© 2021, The chocolate brain. All rights reserved.